SAML 2.0 configuration
Saml2.0 is and authentication method used by openconext (surfconext), Shibboleth and others like SimpleSamlPHP. To use SAML2.0 as and authentication method, you need to select that method during installation of the Presentations2Go Catalogue
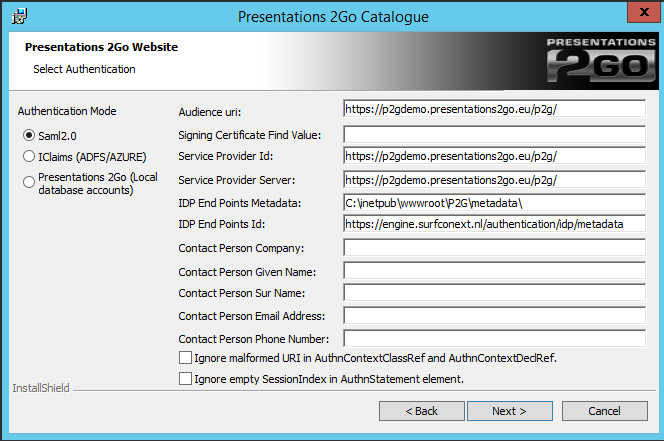
When choosing saml2.0 you will be presented with the above screen.
Modify the following entries:
- Signing Certificate Find Value
- Enter the Signing Certificate Find value in the following format:
- CN=*.organisation.org, OU=Domain Control Validated, O=*.organisation.org
- NOTE: Do not forget a space behind each comma. But do not place spaces around the equal sign (=).
- Pointers to find the Signing Certificate findValue follow later in this document.
- IDP End Points ID:
- Here the Surfconext sample is show but your IdP manager will now what to fill in.
- Ignore malformed URI in AuthnContextClassRef and AuthnContextDeclRef
- purpose is to ignore error that can happen when creating URI from one or both of the attributes (for details please read here)
- Ignore empty SessionIndex in AuthnStatement element
- is to ignore error can happen when AuthnStatement doesn't have SessionIndex (some IDP’s don't populate it).
All of the following attributes are required for optimal functionality.
<RequestedAttributes>
<!-- The attributes that the demonstration identity provider issues. -->
<att name="urn:mace:dir:attribute-def:uid" isRequired="true"/>
<att name="urn:mace:dir:attribute-def:displayName"/>
<att name="urn:mace:dir:attribute-def:mail"/>
<att name="urn:mace:dir:attribute-def:eduPersonTargetedID"/>
<att name="urn:mace:dir:attribute-def:eduPersonAffiliation"/>
<att name="urn:mace:dir:attribute-def:sn" />
<att name="urn:mace:dir:attribute-def:cn" />
</RequestedAttributes>
Finding the Signing Certificate findValue
On the server console open inetmgr (the IIS manager) (WindowsKey-R and type inetmgr)
Navigate to the Server name and then to Server Certificates

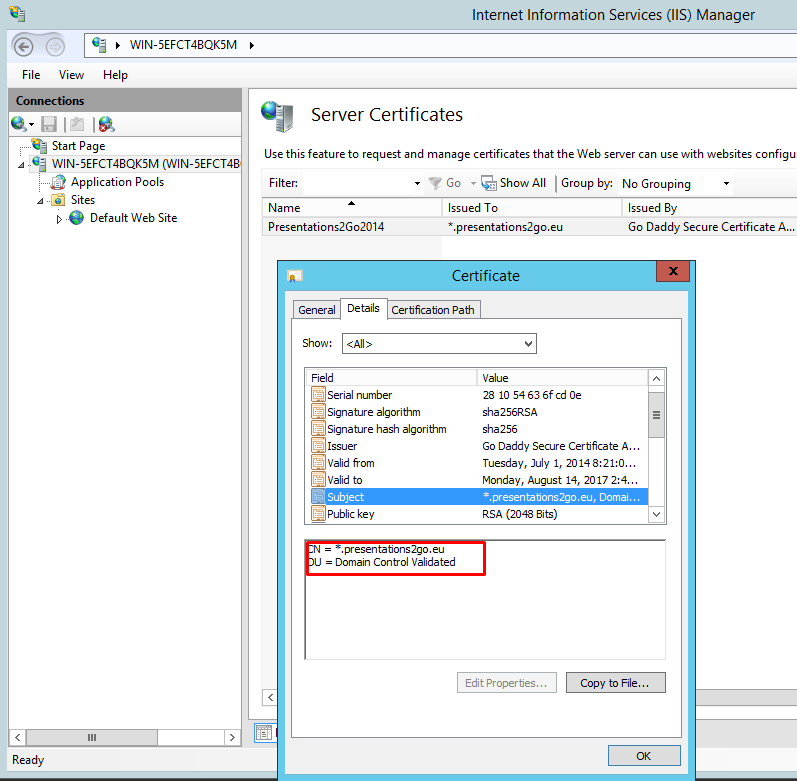
Right Click and select View to open the certificate.
Select the Details tab and scroll down to Subject.
Copy the text in the Textbox to notepad and edit/format it as described earlier in this document.
When finished modifying the values, click Next.
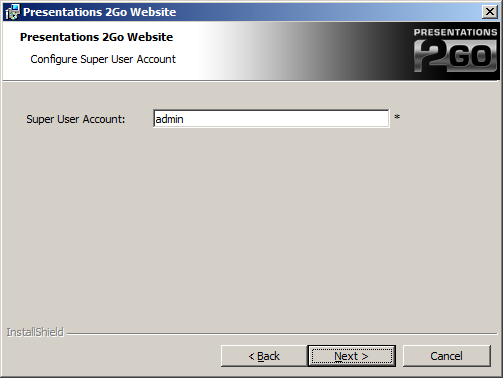
Enter the Saml2.0 UID of the account you want to make superuser of the system. This is often an email address.
When using SAML2 for authentication, the account the website is running under (normally Network Service) needs to have access to the private key of the SSL certificate. To enable this run the certificate snapin (WindowsKey-R and type mmc)
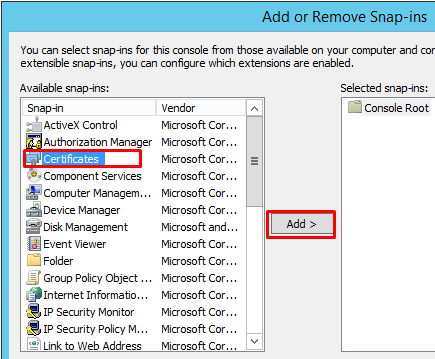
Choose File/Add/remove Snap-in
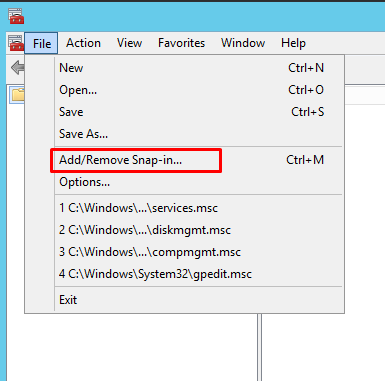
Choose Certificates and Add
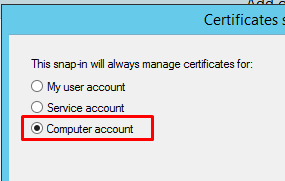
Choose computer account in the next popup
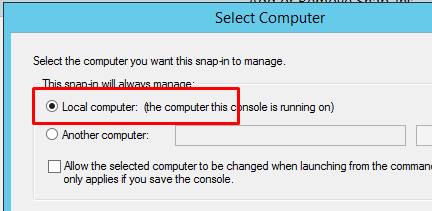
And Local computer after you press Next
Press Finish and Ok
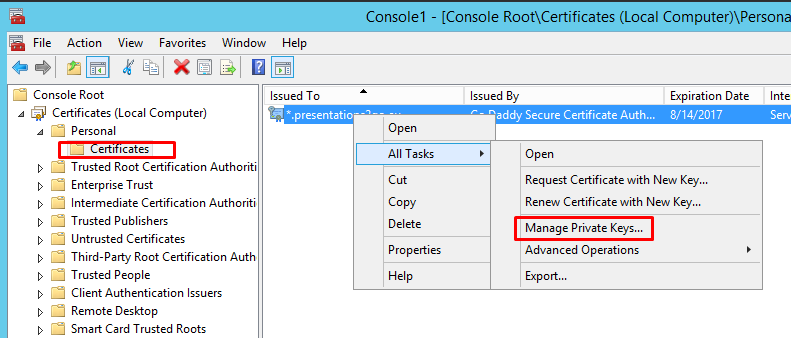
Now navigate to Personal/Certificates, Select the certificate and right click to select All Tasks/Manage Private Keys
Add Network Service to the security settings with default permissions.
NOTE: you will need to follow the same method when you replace the IIS SSL certificate! Furthermore, if the subject/find value changes you will need to change that in the web.config file in c:\inetpub\wwwroot\p2g. See below.
