Extron
Extron devices can be configured with a web-interface almost similar for al certified types. Follow the next steps below to setup your recorder to connect to OVS.
Security
By default the Extron web-interface can be accessed by anyone. So we are going to add a password to the default admin account.
- Go to the Extron recorder web-interface
- Select Configuration

- Select Users and Roles from the sub-menu

- Fill in the new password (twice) and save the new settings.
- Write down the password together with the IP address and the MAC address of the device
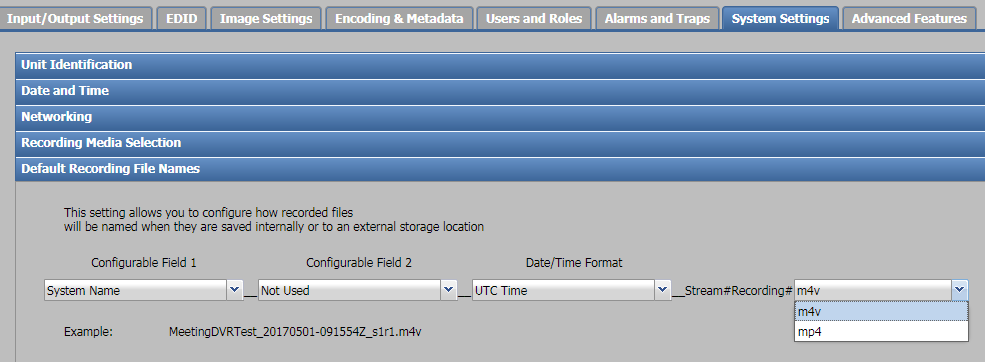
File type en name
The default recording file-type is set to mv4, but OVS requires mp4.
- Go to the Extron recorder web-interface
- Select Configuration

- Now select System Settings from the sub menu
- Unfold Default Recording File Names
- Select mp4
- Save your changes
Automatic file upload
The extron recorders are capable of uploading a recording to another storage location. We will be using this feature to upload recordings to a shared folder on the Presentations 2go OVS server.
- Go to the Extron recorder web-interface
- Select Recorded events

- Click on Publish Settings

- Select FTP/SFTP/CIFS server from the Active Profiles
- Switch to Other FTP/SFTP/CIFS in the Publishing Destination Configuration
CIFS
- Enter the recorder username you have created earlier
- Enter the password for this recorder account
- Select CIFS as transfer protocol
- Enter the server-name and shared root folder
- Set server port at 445
- Enter the unique recorder folder you have created previously in the shared root folder
- Set the domain name (or machine name in case of local-machine accounts)
- Select Complete Recording Folders
Save and test your connection. The extron will create and remove a tmp folder on the OVS server during the test.
NOTE: Other settings are type specific and will be explained per type.