Paste XML
You can add a tool provider for each Presentations2Go group.
Step 1
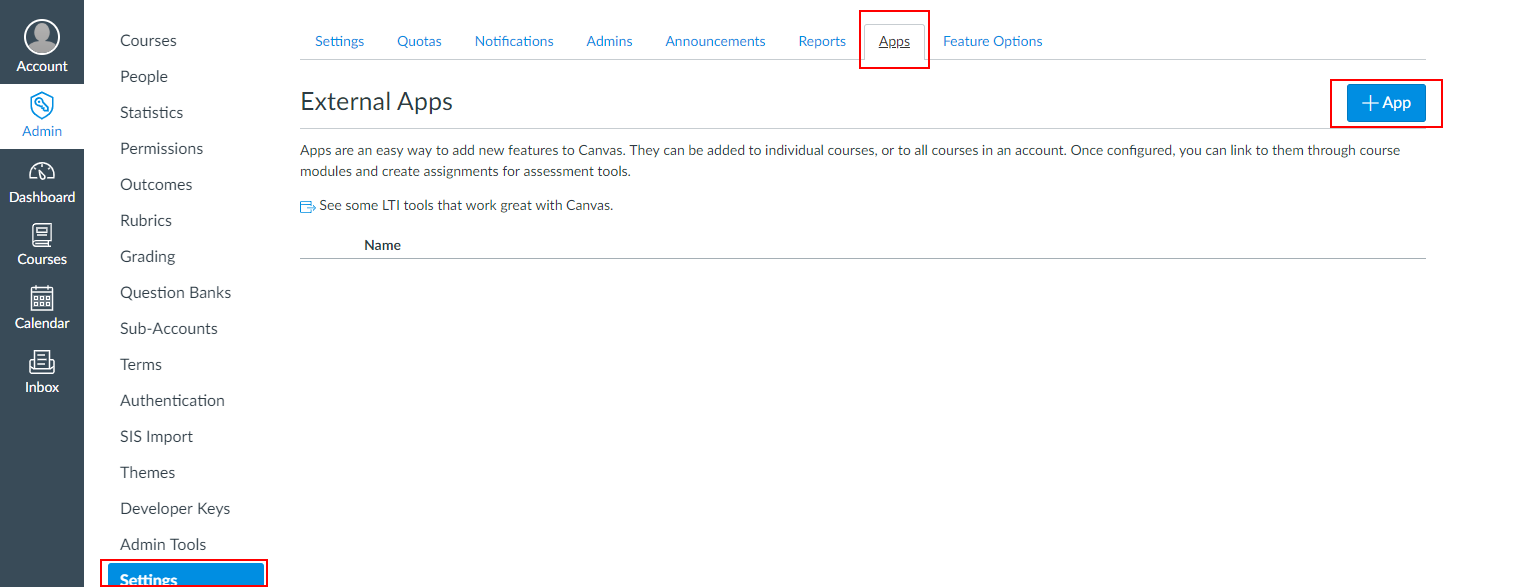
In the admin menu select Settings, Apps and create a new app with +APP
Step 2
Adjust the XML code from the Presentation2Go key pair to you needs e.g.
<?xml version="1.0" encoding="UTF-8"?>
<cartridge_basiclti_link xmlns="http://www.imsglobal.org/xsd/imslticc_v1p0" xmlns:blti="http://www.imsglobal.org/xsd/imsbasiclti_v1p0" xmlns:lticm="http://www.imsglobal.org/xsd/imslticm_v1p0" xmlns:lticp="http://www.imsglobal.org/xsd/imslticp_v1p0" xmlns:xsi="http://www.w3.org/2001/XMLSchema-instance" xsi:schemaLocation="http://www.imsglobal.org/xsd/imslticc_v1p0 http://www.imsglobal.org/xsd/lti/ltiv1p0/imslticc_v1p0.xsd http://www.imsglobal.org/xsd/imsbasiclti_v1p0 http://www.imsglobal.org/xsd/lti/ltiv1p0/imsbasiclti_v1p0p1.xsd http://www.imsglobal.org/xsd/imslticm_v1p0 http://www.imsglobal.org/xsd/lti/ltiv1p0/imslticm_v1p0.xsd http://www.imsglobal.org/xsd/imslticp_v1p0 http://www.imsglobal.org/xsd/lti/ltiv1p0/imslticp_v1p0.xsd">
<blti:title>P2Go Cartridge</blti:title>
<blti:description>P2Go Xml Cartridge Demo</blti:description>
<blti:launch_url>https://demo-sc.presentations2go.eu/P2G/LTIToolProvider/Content/d427ad88-431e-41fb-9dd7-a5f178756d8d</blti:launch_url>
<blti:secure_launch_url>https://demo-sc.presentations2go.eu/P2G/LTIToolProvider/Content/d427ad88-431e-41fb-9dd7-a5f178756d8d</blti:secure_launch_url>
<blti:extensions platform="canvas.instructure.com">
<lticm:property name="domain">demo-sc.presentations2go.eu</lticm:property>
<lticm:property name="icon_url">https://demo-sc.presentations2go.eu/P2G/images/logo/logo_lti.png</lticm:property>
<lticm:property name="privacy_level">public</lticm:property>
<lticm:property name="text">General placement</lticm:property>
<lticm:property name="tool_id">Presentations2Go</lticm:property>
<lticm:options name="editor_button">
<lticm:property name="enabled">true</lticm:property>
<lticm:property name="privacy_level">public</lticm:property>
<lticm:property name="icon_url">https://demo-sc.presentations2go.eu/P2G/images/logo/logo_lti.png</lticm:property>
<lticm:property name="text">Editor</lticm:property>
</lticm:options>
</blti:extensions>
</cartridge_basiclti_link>
Step 3
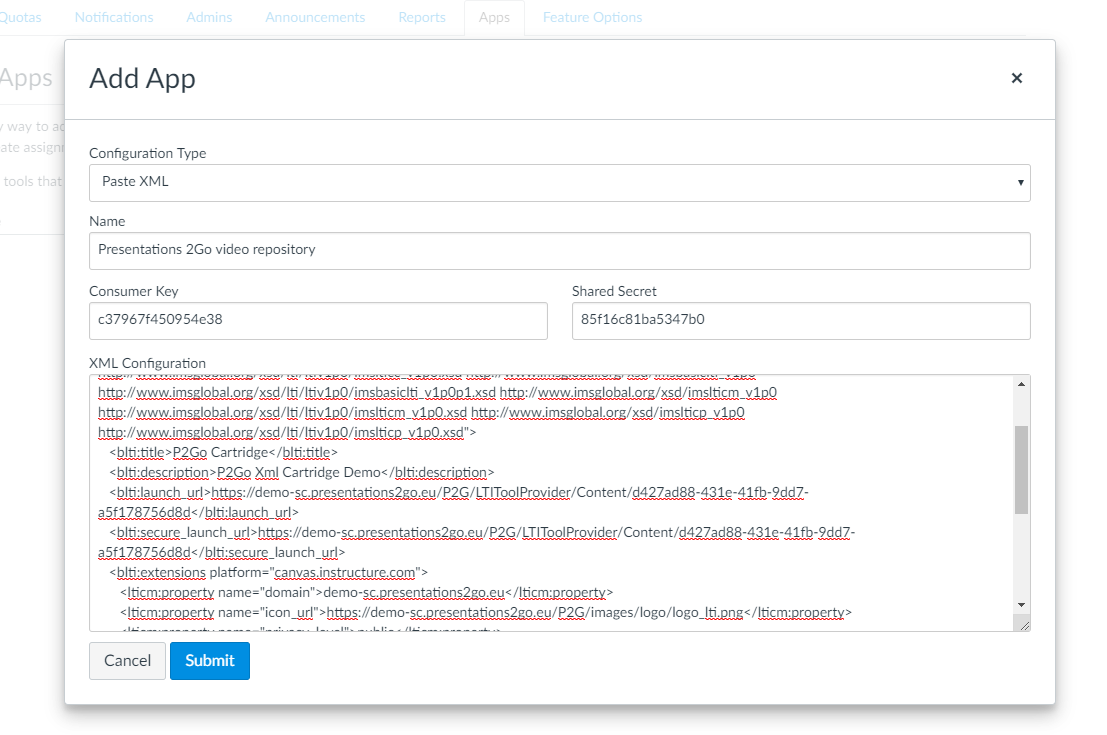
- Select Past XML
- Paste the customized XML
- Add consumer key
- Add Shared Secret
- Submit
Step 4
Check your settings
- Go to a course
- Select Modules
- Add a new page

- Select External Tool
- Click on your newly created tool (notice the name was set in the XML)
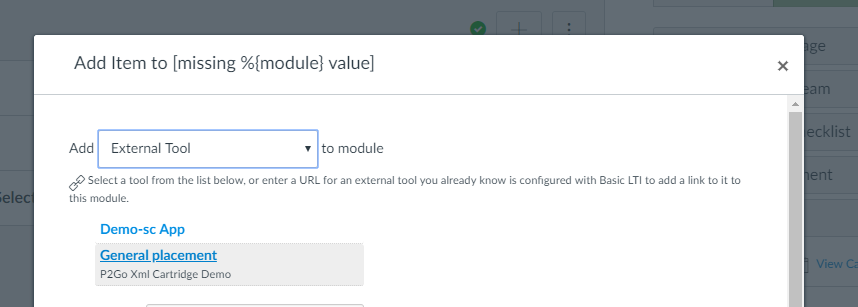
- Replace the name (General Placement in this example) with your new page title
- Add the new item

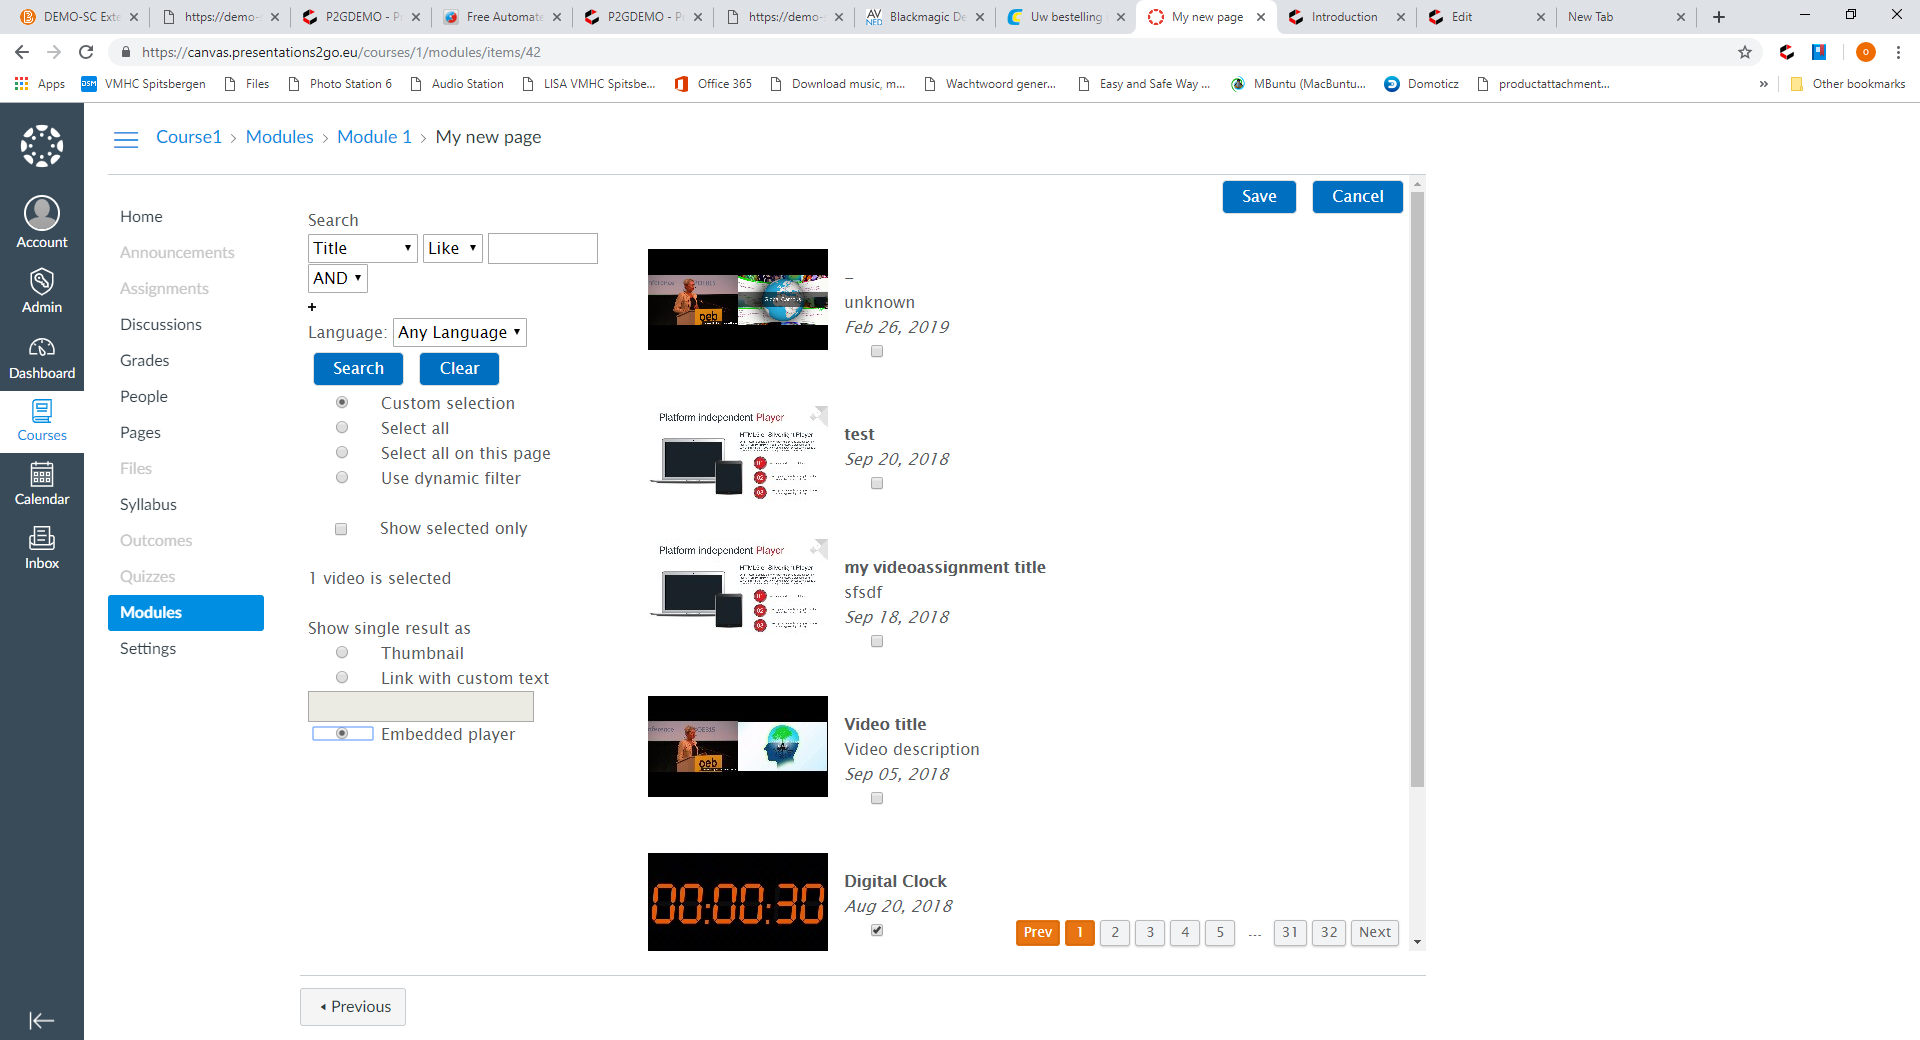
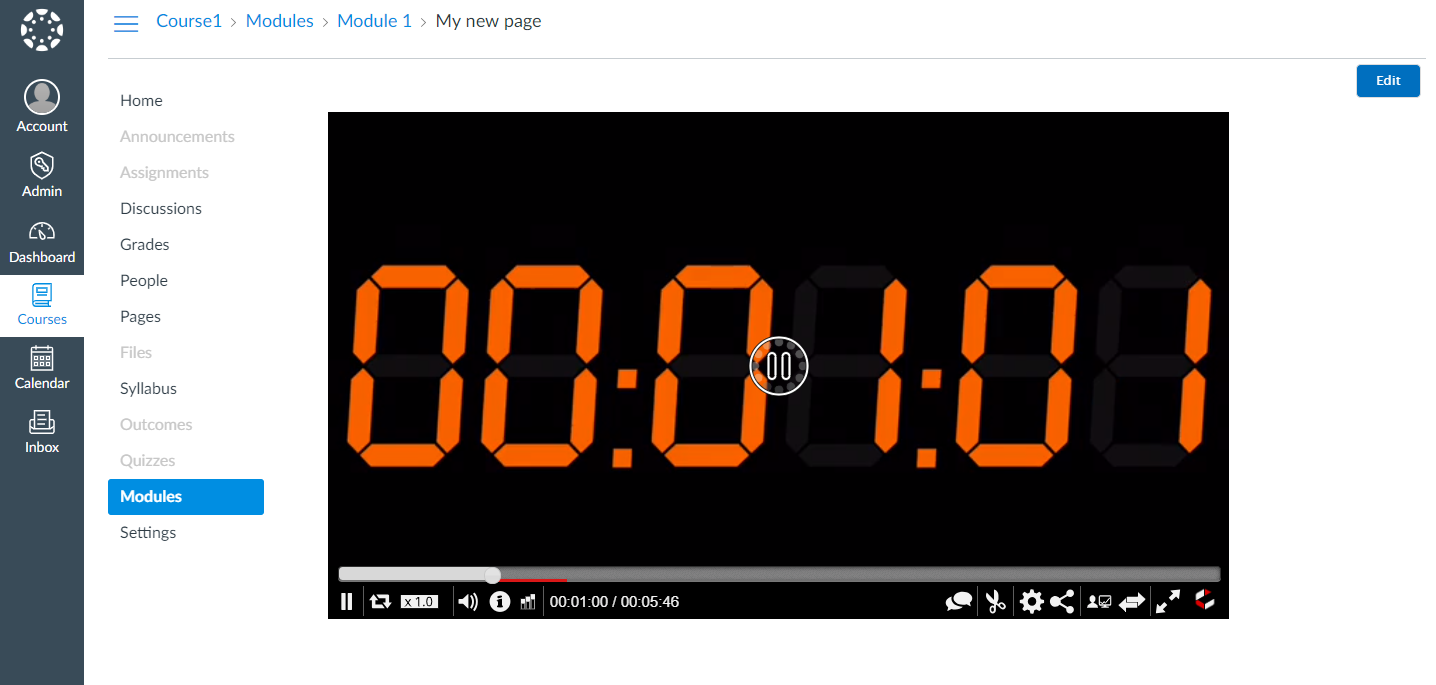
Now we have a new page, click on the new page to selecet content
- Click on your new page

- Click on select and follow the instructions from Getting Started | Select

