LC102

OVS Certified features
Remote start record
Remote stop record
Remote start record and streaming
Remote stop record and streaming
Remote scheduling
Download Content
Upload content FTP
General
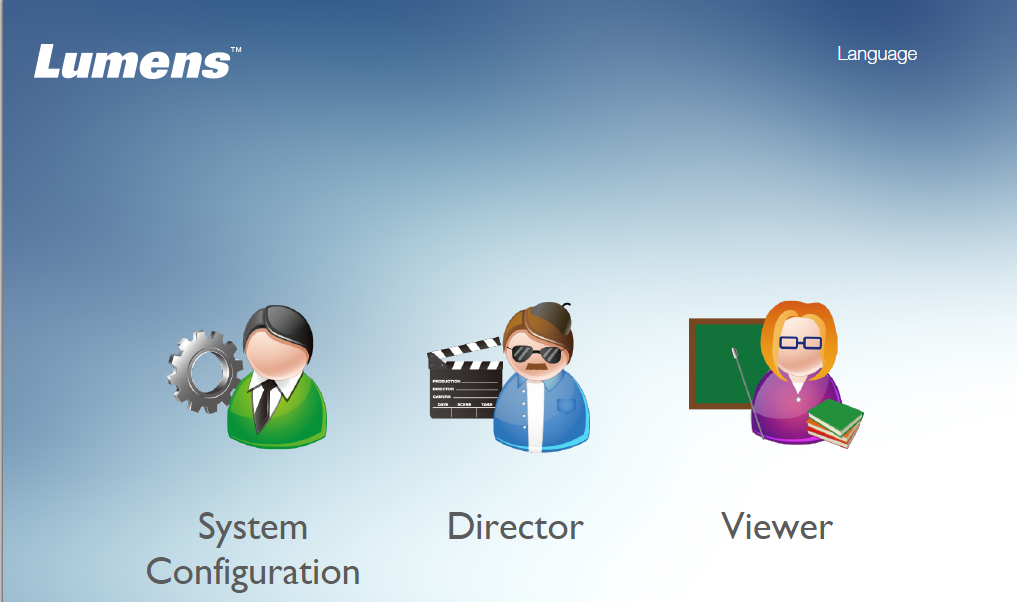
The recorder web interface knows 3 types of entry:
- Administrator; System Configuration
- Director; Control recordings
- Viewer; Playback recordings from the recorder device
Important note: The recorder is locked when someone has entered the web interface in Configuration mode. The administrator needs to sign-out first before a new recording/stream can be started.
Configuration
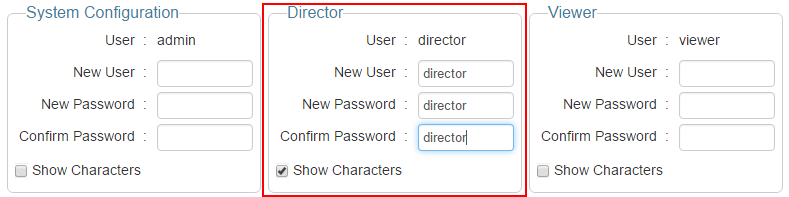
OVS communicates with the recorder via the Director account. You can change the director account into another username/password.
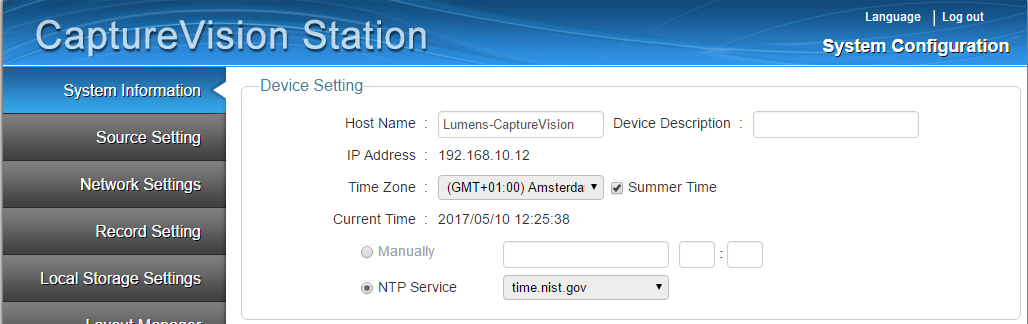
- Click on System Configuration and sign-in as admin
- Select System Information

- Change password (and optional username) for the Director
- Commit with Apply
- Check the Current time and Time zone to match your location
- Commit with apply if you make changes.
Setup local storage
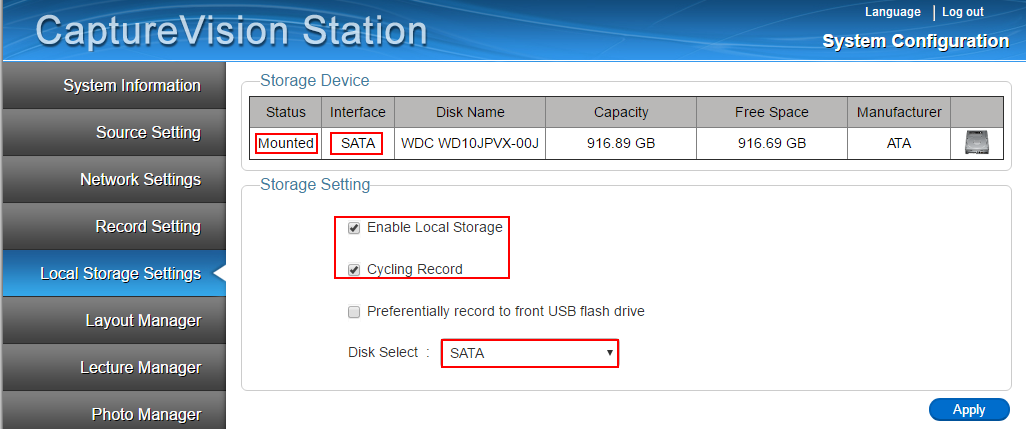
We are storing the recordings on the internal disk via Local Storage Settings
- Click on Local Storage Settings in the left menu
- Check if your disk is mounted
- Check if the same disk is selected
- Enable Local storage
- Check Cycling record in order to automatic cleanup old recording when the disk gets full
- Apply your settings
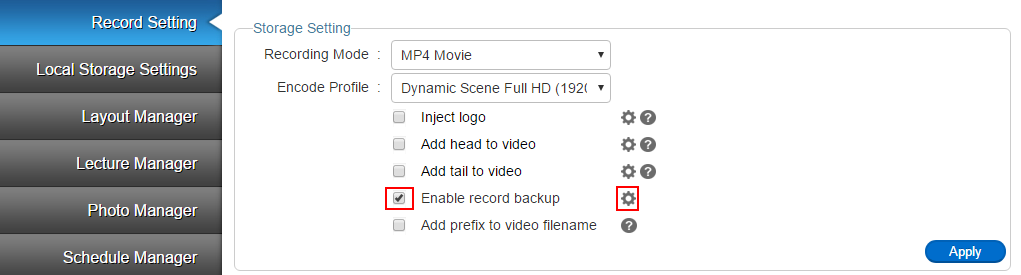
Record Setting
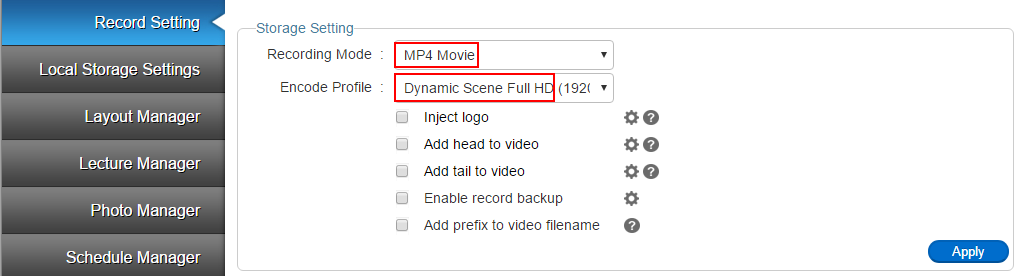
For OVS we need to record in MP4 format, preferably in Full HD mode
- Select Record Setting from the left menu
- Change Record Mode into MP4 movie
- Select Dynamic Scene Full HD as encode profile
- Commit your changes with Apply
Streaming Setting
The recorder will be setup to stream to an OVS RTMP bridge.
- Select Record Setting from the left menu
- Scroll to Streaming Setting
- Change Streaming mode into WebCasting
Important note: Streaming is only possible while recording. However, recording is not possible if the target streaming server cannot be reached.

- Click on the configuration icon next to the streaming mode
- The Primary Server URL should look like rtmp://IP:1935/multi or rtmp://IP:1935/live (for single bit-rate live streaming)
- The Stream name should be the same as you have setup when adding the recorder to OVS (Add recorders) (one word with only letters and numbers, no spaces)
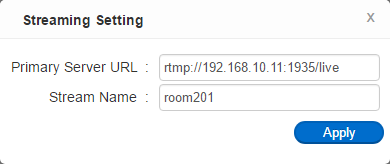
- Apply these settings
- Now change the Encode Profile into User Define
- Set the resolution to 1920x1080
- Select the Main Profile
- Change the bit-rate into 4000 or 6000 kbps
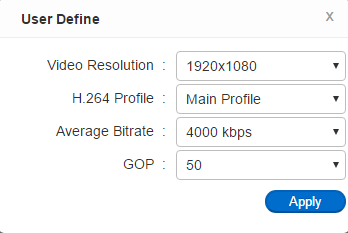
- Confirm the settings with Apply
Make sure you Apply the complete Streaming settings too!
Source Settings
Video Source
The LC101/102 has a total of 8 input sources. However, not all inputs can be connected simultaneous. You use either HDMI or VGA for input 1 and 2. In total you can attach 6 input sources, but only address 4.
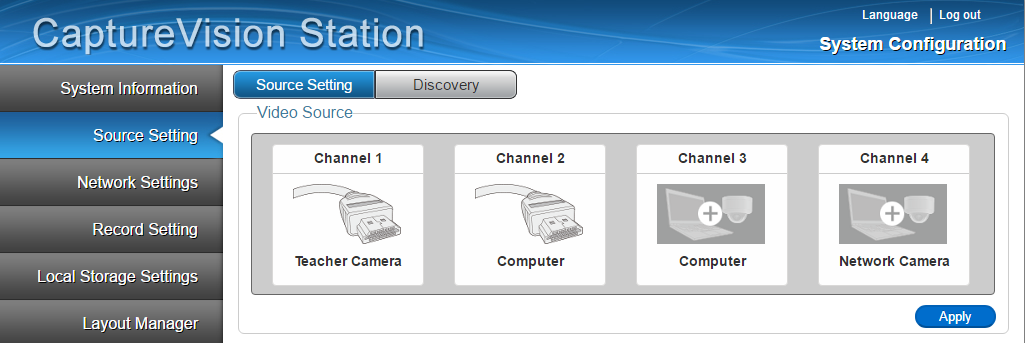
If you want to make use of the OVS smart player functions you would only use 2 input channels. But if you do not set canvas and slide source settings in the default meta-data on OVS you can also use other layouts. If you want to use Lumens IP camera's you first need to use the Discovery button.
To setup the channels:
- Click on a channel
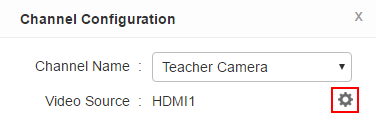
- Now click on the configuration icon
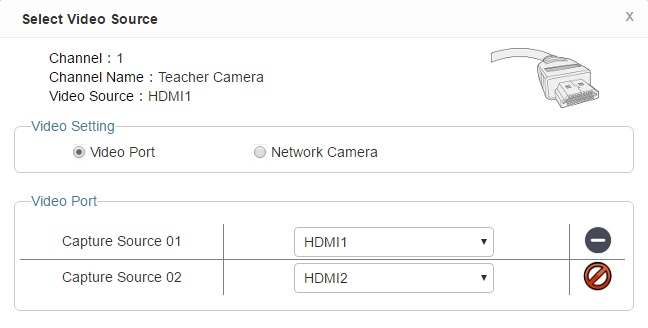
- Select a video port and connector type.
- Confirm changes with Apply
Audio Source
All incoming audio sources are mixed into the output signal. This can be HDMI or line inputs. Via the internal mixer you can setup an preferred mix.

Layout Settings
The recorder can be setup to have different layout for recording/streaming versus the preview/display layout. For OVS we prefer to use a side-by-side recording layout.
The display layout can be either a single source (e.g. the presentation source if you connect the output to a beamer) or a combination of sources.
In this menu you can only predefine the available layouts for the remote control.
- Select Layout Manager from the left menu
- Make sure "Enable record layout synchronize display layout" at the bottom is turned off
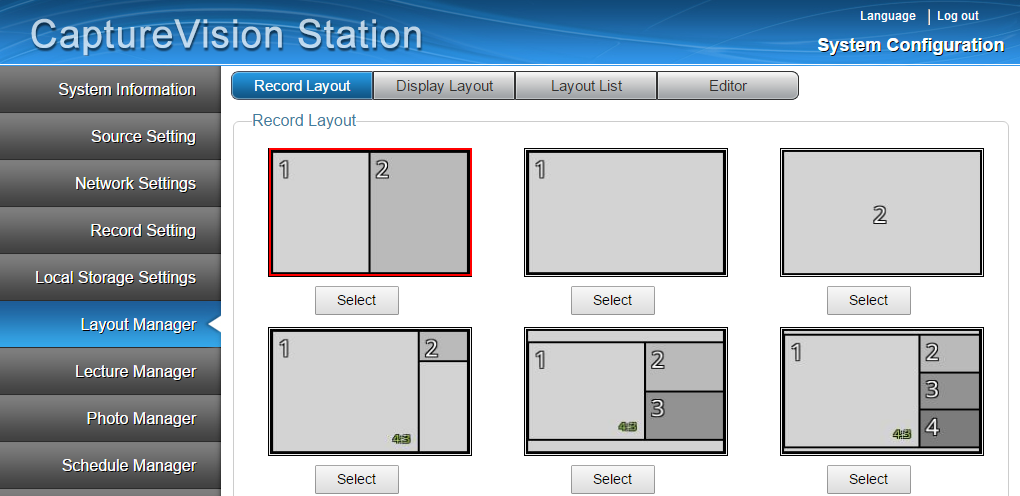
- Make sure you have connected a preview monitor to the HDMI/VGA image output of the recorder
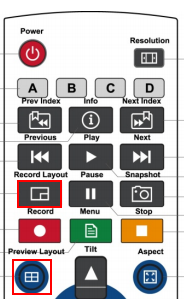
- Click the grey square Record layout button and select a side-by-side recording layout (like marked in red above)
- Click the blue round Preview Layout button and select the preferred preview layout
Automatic file upload vs OVS download
If the recorder and OVS are in the same subnet, OVS will download the content automatically after recording and match with the server side configured meta-data.
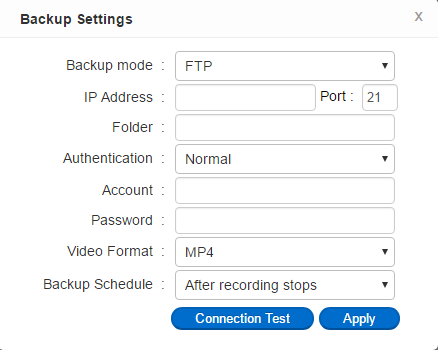
Some of the certified features will not be available in a Cloud setup. E.g. starting/stopping/scheduling from the OVS website will not be possible. However, content can still be uploaded to OVS via FTP record backup.
NOTE: Only use this feature if the OVS cannot communicate with the recorder (cloud setting).