IIS
Replace the certificate in IIS
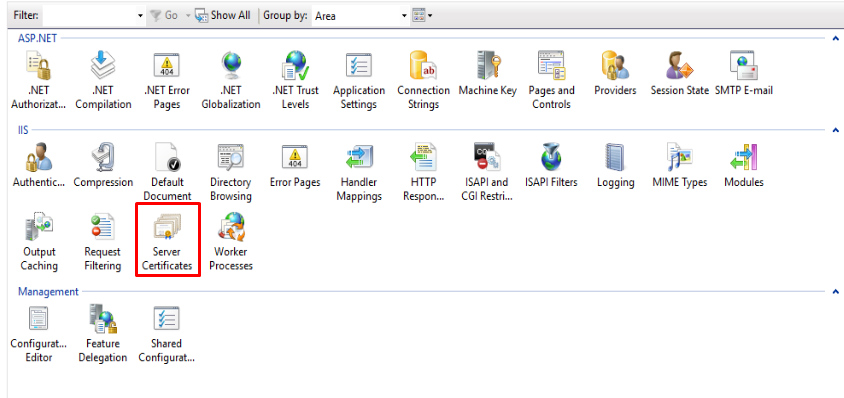
- Start the IIS management interface (Start/Run inetmgr)
- Select the Server in the left pane and select Certificates in the middle pane.
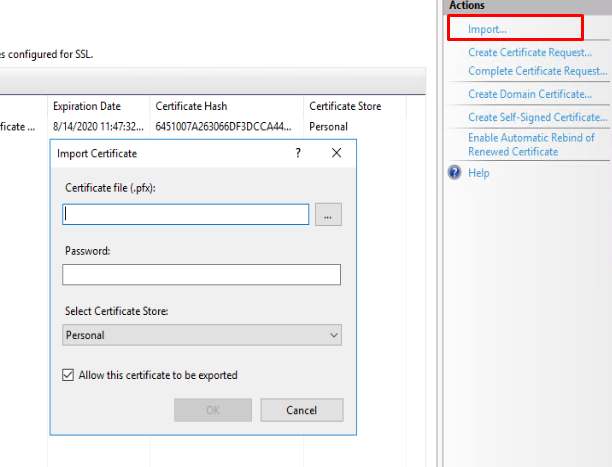
- Select the Import option in the right pane and browse to the certificate location to select the pfx file.
When the certificate is password protected, enter the password.
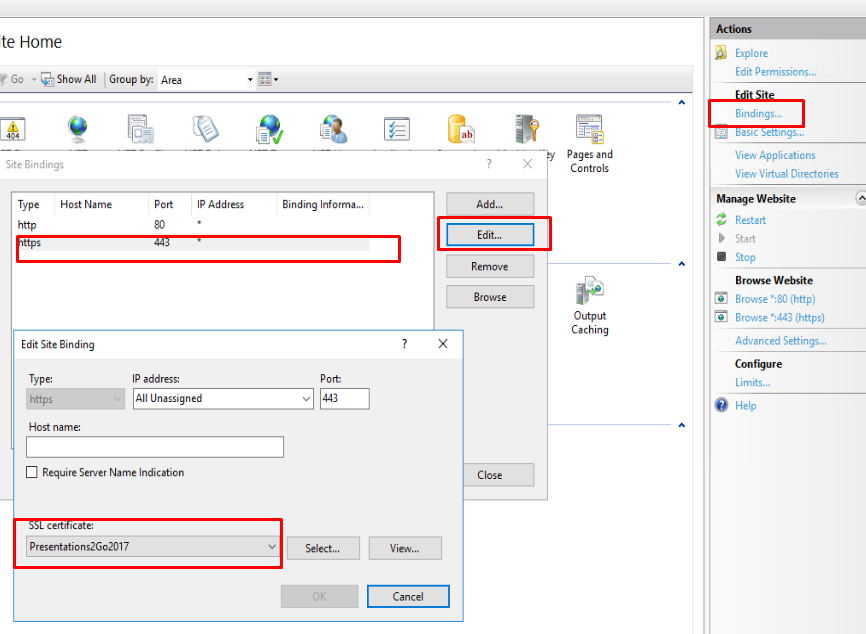
- Once the certificate is imported you need to change the Site bindings to re-assign the certificate to the https port.
If the old certificate is still active, you may get an error message after selecting but just try again to solve this issue.
Set the private key permissions for the certificate
This step only applies when using ADFS or SAML.
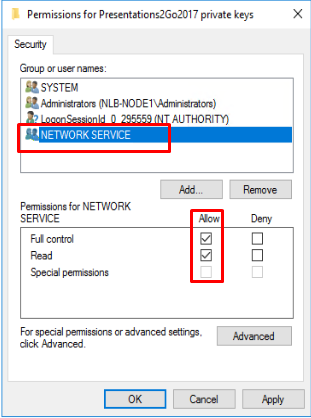
- Change the private key permissions to allow access for network service account
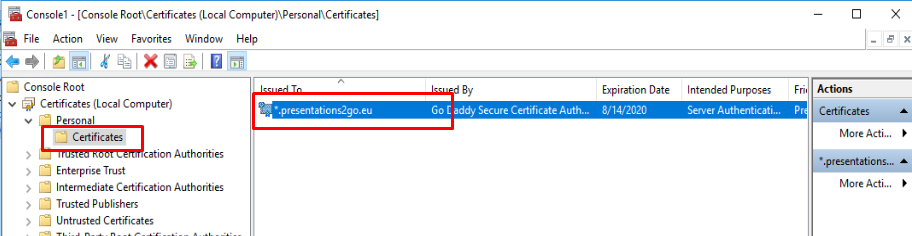
- Start the management console (mmc) and add the certificates Snapin.
- File/Add-Remove Snapin/Certificates/Computer Account/Local Computer/
- Navigate to /Personal/Certificates
- Choose the certificate and right click to select All Tasks/Manage Private keys and add Network Service
- Now Open the certificate (Right click, All Tasks, Open) and select the Details tab.
- Navigate down till you find ‘Subject’.
- Select the text in the content pane:
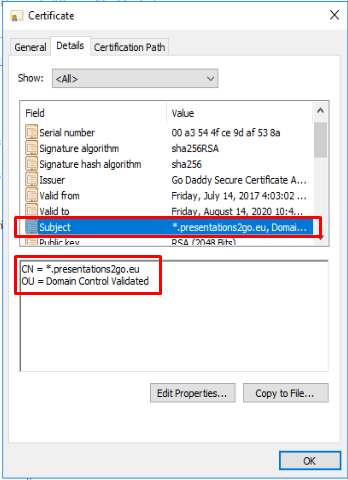
- Check if the Subject is different than the previous subject. If so update it in the web.config file in c:\inetpub\wwwroot\p2g
<SigningCertificate findValue="CN=*.presentations2go.eu, OU=Domain Control Validated" storeLocation="LocalMachine" storeName="My" x509FindType="FindBySubjectDistinguishedName" />
The find value should contain 1 space character between the comma and next value. See green highlights above